Easy and Delicious Breakfast Sliders Recipe
Looking for a fun, satisfying, and crowd-pleasing breakfast that’s perfect for weekends, brunches, or feeding a hungry crew? These Breakfast Sliders are just the ticket!
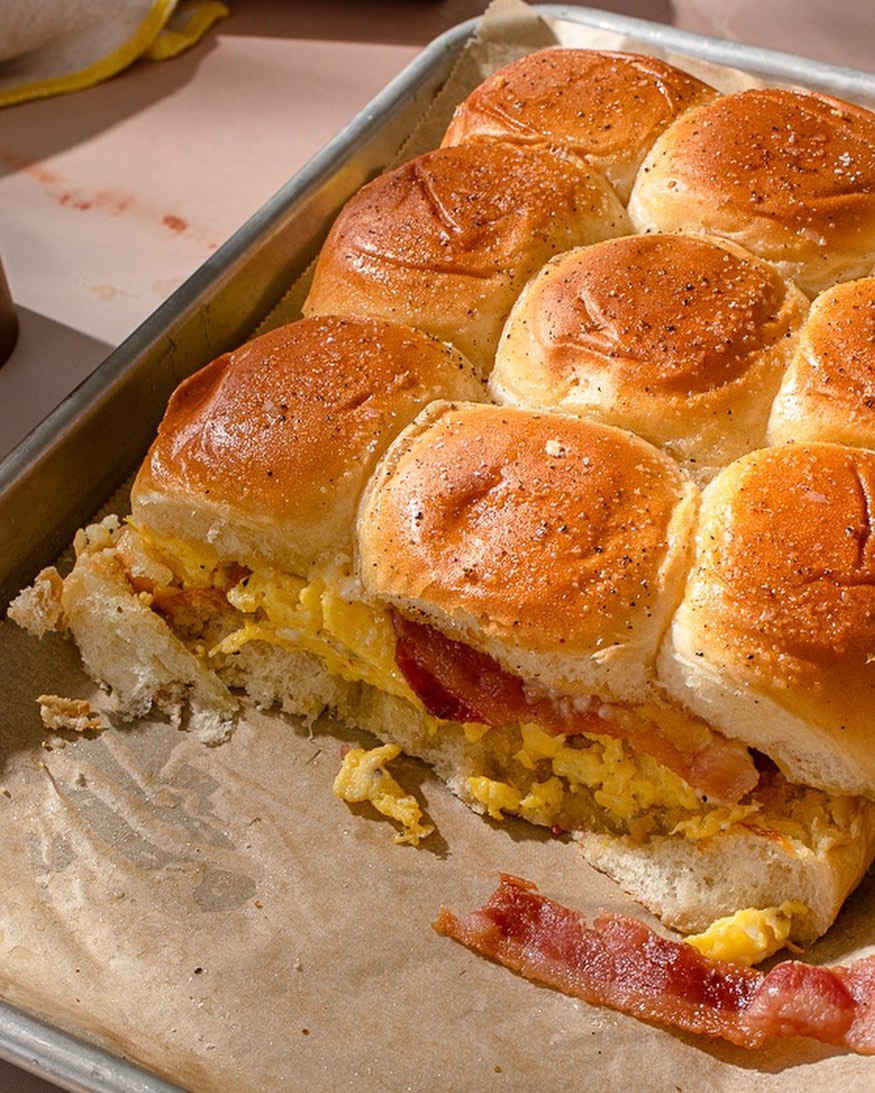
Packed with layers of fluffy eggs, savory sausage or bacon, melty cheese, and soft slider buns, they’re everything you love about breakfast — in one delicious, hand-held bite.
Whether you’re meal-prepping, hosting brunch, or just want something extra tasty for your morning routine, these sliders are quick to assemble and even easier to devour.
Why You’ll Love These Breakfast Sliders
✔ Great for a crowd – Makes 12 mini sandwiches in one pan
✔ Fast & easy – No complicated steps or ingredients
✔ Totally customizable – Use any meat, cheese, or toppings you like
✔ Perfect for meal prep – Reheats well for weekday breakfasts
✔ Kid-approved & freezer-friendly – A hit with everyone at the table
The Best Breakfast Sliders Recipe
Ingredients (Makes 12 sliders)
- 12-pack slider buns or Hawaiian rolls
- 6 large eggs
- ½ cup milk
- 6–8 slices of bacon, breakfast sausage patties, or ham
- 6–8 slices cheddar, American, or Swiss cheese
- 2 tbsp butter, melted
- 1 tsp everything bagel seasoning (optional)
- Salt and pepper, to taste
How to Make Breakfast Sliders
Step 1: Cook the Meat
- In a skillet, cook bacon or sausage patties until fully cooked.
- Set aside and drain on paper towels.
Step 2: Scramble the Eggs
- In a bowl, whisk together eggs, milk, salt, and pepper.
- Pour into a nonstick skillet and scramble over medium heat until just set.
- Remove from heat.
Step 3: Assemble the Sliders
- Preheat oven to 350°F (175°C).
- Slice the slider buns horizontally, keeping them connected (top and bottom halves).
- Place the bottom half in a greased baking dish or on a sheet pan.
- Layer in this order: cheese slices, scrambled eggs, meat, and another layer of cheese (optional).
- Add the top buns.
Step 4: Brush and Bake
- Brush the tops of the buns with melted butter.
- Sprinkle with everything bagel seasoning, sesame seeds, or a pinch of garlic powder (optional).
- Cover loosely with foil and bake for 10 minutes.
- Remove foil and bake another 5–7 minutes, until golden and melty.
Step 5: Slice and Serve
- Use a serrated knife to cut into individual sliders.
- Serve warm with your favorite sauces or fresh fruit on the side!
Tasty Variations to Try
1. Veggie Breakfast Sliders
🥬 Add sautéed spinach, bell peppers, mushrooms, or onions to the egg layer.
2. Sweet & Savory
🍯 Use Hawaiian rolls and add a drizzle of maple syrup or honey butter glaze.
3. Spicy Kick
🌶 Use pepper jack cheese, add jalapeños, or drizzle with hot sauce.
4. Make-Ahead Sliders
⏱ Assemble the night before, refrigerate, and bake in the morning.
5. Freezer-Friendly
🧊 Wrap individual sliders in foil and freeze; reheat in oven or toaster oven.
Tips for the Best Breakfast Sliders
✔ Don’t overcook eggs – Keep them soft so they stay moist after baking.
✔ Use high-quality buns – Soft, buttery slider rolls work best.
✔ Let them rest 2–3 minutes after baking – Makes slicing cleaner and easier.
✔ Double the batch – They go fast, especially at brunch gatherings!
What to Serve with Breakfast Sliders
🍓 Fresh fruit or fruit salad – Light and refreshing on the side
🥤 Orange juice, coffee, or smoothies – Classic breakfast pairings
🥓 Extra bacon or breakfast potatoes – For heartier plates
🥗 Mixed greens salad – Great for brunch spreads
How to Store and Reheat
- Store: Cover and refrigerate for up to 3 days.
- Reheat: Warm in the oven at 350°F for 10 minutes or microwave for 30–60 seconds.
- Freeze: Wrap individually and store in freezer bags for up to 2 months.
Wrapping Up
These Easy and Delicious Breakfast Sliders are everything you love about a classic breakfast sandwich — just mini, melty, and made to share.
Perfect for feeding a crowd or stocking your freezer with tasty morning fuel, they’ll quickly become a go-to favorite.
What’s your ultimate slider combo? Drop your favorite toppings or fillings below! 🍳🧀🥓